


Ok, so finally I found the photos for this episode of Grim’s Dungeons of Doom; Realm of the dead. This article, we are going to make some Necropolis Obelisks or tomb marker type monuments, these will match the rest of the other dungeon set and work well as standalone pieces in their own right. As ever, you can catch up with other articles in this series by clicking on the link in the menu, to see how the set is put together. I’ll be detailing two different designs here, but the idea is simple so it’s just to illustrate how you can make up your own designs with little real effort. Anyway, lets get going and build something…
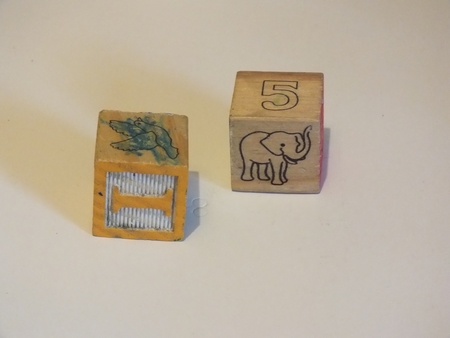
So, ok, new source (or old possibly) of model making materials are kids wooden blocks. I scored these when we had a toy cull in my house. (We go through all the toy boxes with the kids and “cull” all the old, broken and unwanted toys! If you have kids, you’ll know what I mean! ) I got a few of these, but if you need to buy them, they are cheap enough, but could be substituted by making them from card, or creative cardboard box cutting, cutting them from a wood piece or many other ways, a box cube shape is all that’s needed. (we’re going to cover them, so don’t worry too much about anything other than the shape)
For the skull-top design obelisk, you’ll need two blocks per piece, Use nice chunky blocks for good thickness (I used 3cm ones I think, so anything around that size would do if you want to replicate this build)

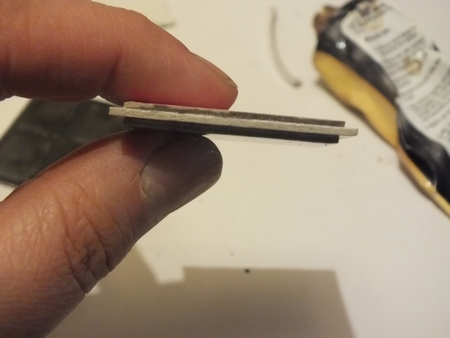
Next, we need a nice suitable sturdy base to mount them on, I used thick card (I used kids cardbook thick card to be exact) then used the textured wallpaper that I’d used to make the flooring before, to cover them and add detail, note that I’ve cut them to 3 X 3 squares. This is so if I place them on the dungeon board they’ll match up perfect, and if on an outdoor type board, they will contrast against it too.

Next, we clad the sides of the blocks with a strip of rough textured wallpaper. Remember the the top and bottom don’t matter, as they will be joined to other elements in the build.

Once you’ve done that, the first block can be glued centrally to the base. Next you need to cut two squares of card out to be sandwiched between the top and bottom block and act as a divider for added detail to break up the shapes. The two squares of thick card are a few millimetres wider than the 3cm block and should be added also centrally on the top so that they provide a small edge jutting out at all sides. You know already that I don’t measure if I can help it, just offer it up to the pieces and cut accordingly.

Clad the top of the other blocks and then stick them on top of the others.

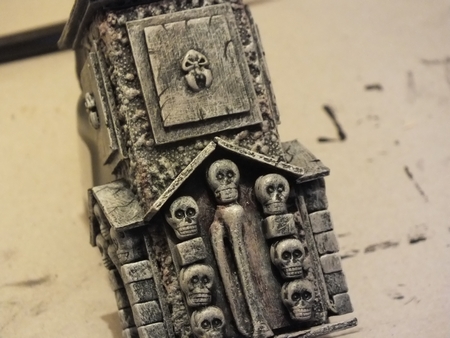
Now we have the columns built, now you can start to embelish them to match the other necropolis themed pieces. Add a large skull from some cheapo skeleton garlands like before in the Open gateway piece. Use the pelvis from them to mount the skull in.

Next, we need to add some simple detail to the pillars, and we are going to do this with the thick card we have been using. As you’ll see there are 8 blank spaces where we can fill in some detail. We can leave these as they are , but for this we’re going to fill them in with some raised plaques, so cut 8 similar sized small rectangles to put in the spaces. Then, cut another 8 even smaller than the others.

Glue these onto the areas as shown. This plaque area will be used to add an accent of more proper detail, but again you could opt to leave blank or whatever detail you like.

I’ve added some GW tomb kings standard tops at the front and some shields out of my bits box, in keeping with the theme, they all have a skull, spike or bones design. Also added was a couple of bones from the arm of the skeleton from the halloween garland the skulls came from. All these elements were replicated so that the two pieces match.


What I did do that I haven’t captured a pic for, is adding some GW orc skull shield bosses in the centre of the bottom plaques. (you’ll see them in the other pics) These first obelisks are as good as done, so lets move onto the next type.

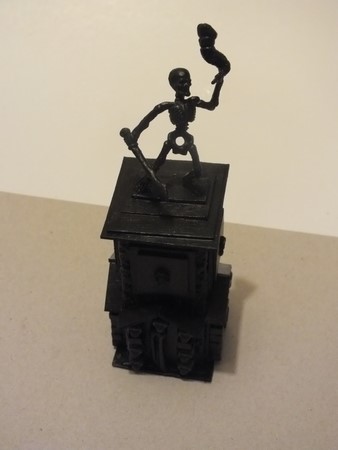
Ok, so this type forgoes the building block construction and opts for a simpler method. find a tube type of box (toothpaste, medicene, sweets/candy etc) and we’ll use a section of it to form a column. You can use the block technique if you prefer as all you need is a column. Once you have the shape, clad it on the sides, with the textured wallpaper like before. I didn’t need to clad the top as I added a new bit to the top.

Create a base, as before. This time I decided to go for a 4 x 4, although it’s up to you what size you want.

Since I was going to add a statue to the top, I ended up making a cap that would accommodate the skeleton figure, so two identical sized squares were cut, and another that was larger, these were then sandwiched together as per the photo below, making sure they lined up with each other in the centre.
Stick it to the top part of the column, then stick the whole thing down to the base.

For the top I have some large plastic skeleton figures I got from the poundshop. These are made from really cheapo plastic but, most of them are pretty nice sculpts once you use a bit of hot water to get them moulded to the correct pose (being cramped up in the bag, they are a bit twisted so the hot water technique sorts them out quite nicely)

After trimming the base to a rectangular shape, I glued it onto another piece of thick card. Also they need trimming of plastic flash, as like I said, these are cheap figures, and we all know what cheap figures of this ilk are like.

Stick this whole thing onto the top.

Make 4 plaques like before, then add these to the top for detail.


For the bottom detail, I cut 4 identical shapes as in the pic, one for each side.

Glue down seven skull beads, a couple of square 5mm beads and a skeleton garland bone to form a pattern like thus on two of the shapes. Three skull beads, ten square beads and a bone make up the two others. Make up what ever patterns you like.

Glue them down at the base, then take some small strips of card to create the top detail. Now we are pretty much done and ready to paint.

Paint everything with a black undercoat.

Drybrush and highlight in the usual dark grey/light grey/white scheme the same as the other pieces in you set. Add some brown & black washes, and detail some cracks on the stone parts to age it further.

The spiked shield was painted as on the open and doored gateways to match.


And with that, your pieces are done. You can make all manner of obelisks this way, adding different elements rather than the death themes will give an alternate feel. The devil is in the detail, so whatever embelishments you add, that will greatly affect the result, as will the painting.
Anyway, I hope that you enjoyed this long overdue article, and I shall be back with another Grim’s Dungeons of Doom; Realm of the Dead, with something every graveyard needs, Graves!
Later!!

Brilliant as always Will!
Cheers Roger.
LikeLiked by 1 person
Thanks mate! Nearly lost all the photos for this one, and a few others I’ve made already, so it nearly never came about!! I’m going to have to organinse myself a little more! what with the kids being off school, my house being a building site (scaffolding up, roof rebuilt and further works to come) it’s a bit tricky to get to sit down and concentrate, plus I think I have inherited some throat infection/bug today, so all progress has been slow!!
LikeLike