
")

Part 4: Constructing the dungeon walls.
Back again with the next part of the tutorial of Grim’s Dungeons of Doom, this time dealing with quick and easy, not to mention great looking modular 3d dungeon walls.
I want to start by adding a little about how I came to the decision to construct the walls the way I have for this build. I felt the need to have them made from something substantial. Sure I could have gone for anything from paper models (such as world works, or even free from germy) to DM Scottys 2.5d method, hirst arts or spending a fortune on tons of resin stuff, there are loads of ways to achieve the main structures.
While those are cool and valid, I wanted to come up with a really easy system for churning them out if I needed to make shit loads with minimal time and effort. So, with an idea in my head, I took a trip to my local DIY shop to get some raw materials. Wood.
I thought back to the simple toys of yesteryear, simple wooden shapes and blocks that allowed children to create a myriad of complex shapes from basic cut blockwork. I guessed that if idea was sound, it would be extremely easy to create all the wall sections I would ever need.

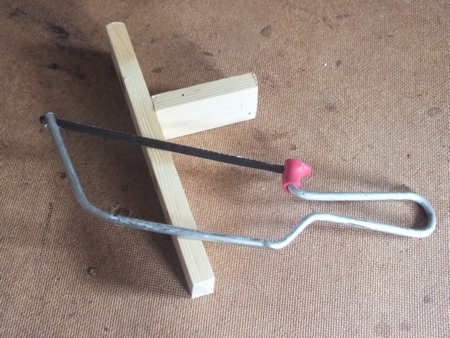
So, on with the build. What I got was some normal pine battons with the dimensions of 35mm x 10mm x 10mm, which ended up costing me about £1.50 each (they were around 5 foot long, so it’s pretty cheap) There are lots of other thicknesses and sizes of this kind of wood you could use, but this is what I settled on, you could use whatever you’d like) Next, you’ll need to get a ruler and pencil and decide how to size your wall sections. I used rough measure for mine so it’d size up visually on my board, so therefore the pattern of the wallpaper dictated my intial measure, although it’s totally up to you. All I can say is that keep these sizes consistant when creating your other pieces, as this makes it easier to create well fitting dungeon schemes later. Also your going to need at least 6-10 of each size piece, just think about this as creating a set of dungeon lego! The more bits you have, the more variety you’ll have to make diverse designs.
Once you’ve marked up all your pieces, get them cut up neatly (make sure any angles are proper square so you’ll not have problems fitting the walls together on the board)
I’m not going to harp on about individual lengths and such, I really want to focus on the construction of the walls, which is the same principle regardless of size or shape.
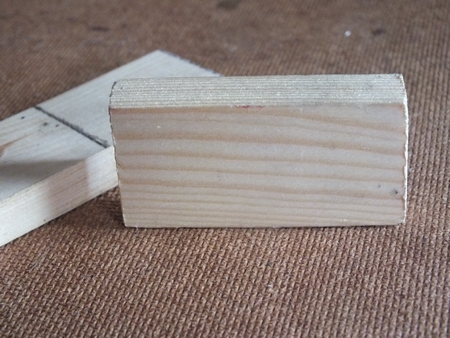
Ok, get your little wooden wall section, it’s plain and not very inspiring at the moment, so your going to need some more detail to it with some more materials.
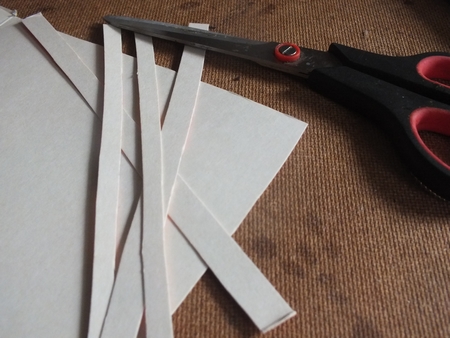
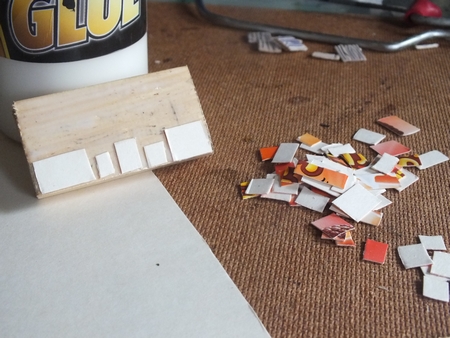
Get some cardstock (cereal box is ideal) and begin to cut some strips of various thickness, some wider, some smaller. Next, begin to cut them up into small squares and rectangles, this may take some time cos’ your going to need lots of them for the next bit!
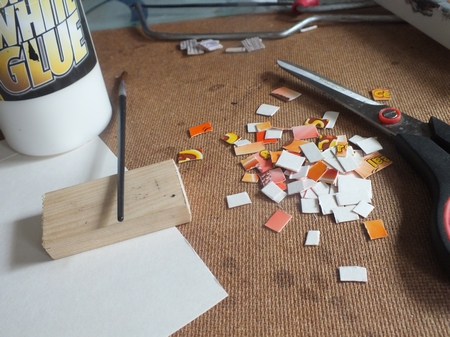
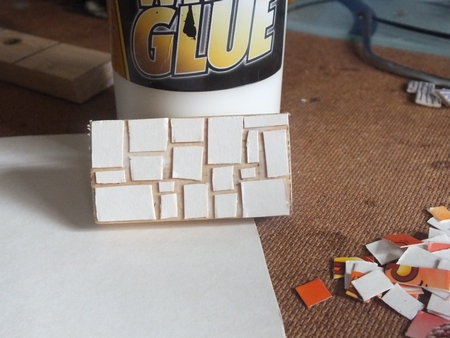
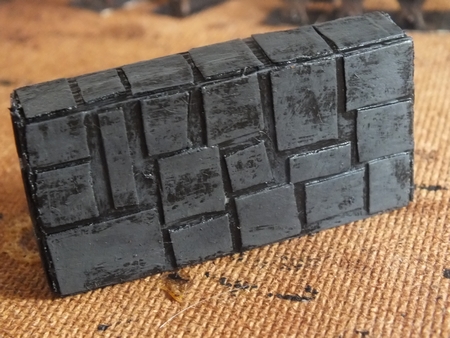
Get some PVA glue an start to clad each side, building up a random block pattern on each face (apart from the bottom,leave that blank, so it fits flat on the board.)
Keep the pattern irregular, and keep a 1mm gap or so between each block. You can do it how you wish pattern wise, just make it look like bricks fitted together like a jigsaw. Continue fitting them until you cover the front and back, sides and top like thus.
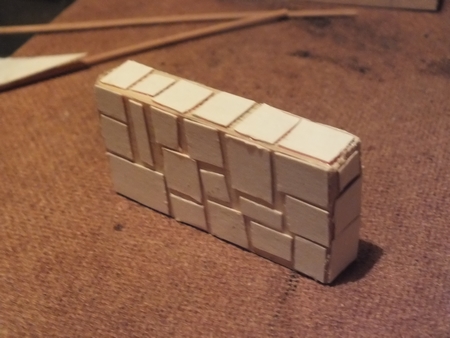
Let the glue dry, the undercoat by black bombing it with spray, acrylic paint, or my preferred method, cheap matt interior paint that I got from my local £1 poundshop (As long as it gets undercoated black, whatever suits what you have.)
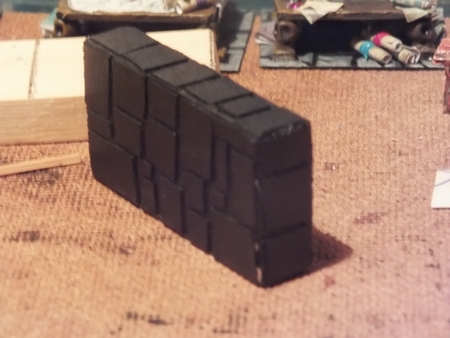
Once, your paint is dry, get some grey paint, and mix a bit of black with it to slowly build up the shades up to your required tone, drybrushing and eventually highlighting the edges for detail. Try and keep these tones the same overall for any structure pieces you add, this will keep a nice seamless fit and give uniformity to the dungeon. (Also, I think there probably a 50 shades joke somewhere here, but its not one of those type of dungeons i’m afraid!)
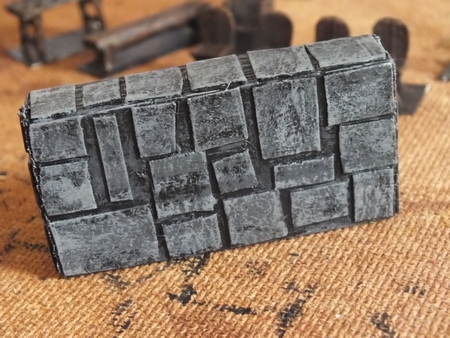
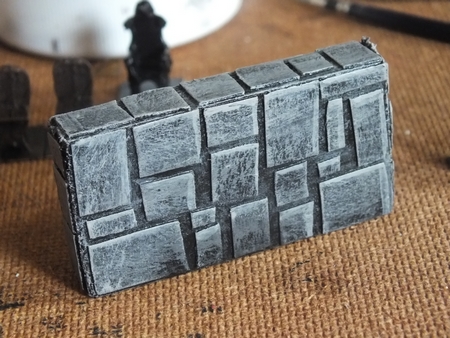
There’s no rocket science to this method, its quick and easy, as after these stages, your wall section will be finished. Repeat this process until all your wall sections are done.
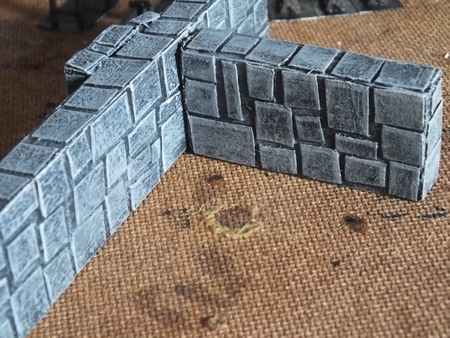
That’s all there is to it, it’s very simple to replicate for yourself and is the process I’ve used for most of my walls. An alternative to this is to use textured wallpaper to clad the sections as in the previous article. It’s really up to you, although you might have to do a little experimentation to get the look your after. Also, try and keep in mind doing them in sets, so that you’ll end up with matching rooms.
You can also build terrain accents directly onto the sections like in some of my other walls. Although I’ll detail some types in separate articles, there are examples like the spidernest wall, library walls, skull walls and so on. The principle is the same, each section starts of as a piece of wood. The good thing about using wood is that it gives some solidity and weight to each one, and an added bonus is that they end up quite robust and able to with stand taking some heavy use and abuse.


So there you have it. Hope you enjoyed this part, there’s more in the works, next up will probably be a monster make or more terrain (maybe both?) Anyway, comments, likes, shares and such are always welcome. AlsoI’d love to see pics if anyone else takes up using this method, so please share the fruits of your labor if you give it a try yourself!!


This is really good, cheap and effective!
LikeLike
Thanks Ann, yeah I love the system, its really quick and easy to create all sorts of different wall sections, I think i’ll be tempted to make a scifi set too, the idea is the same whatever theme you can come up with. i also think my dungeon needs some sewers too….:)
LikeLiked by 1 person
Excellent work, I like the finished effect and the Irregular miniatures doorway. the spider nest is pretty spectacular too!
Cheers Roger.
LikeLike
Thanks Roger. yeah i love the irregular miniatures doors, but alas, there are only a few!!
LikeLike
[…] Next it’s going to need a suitable base, so I got some medium thickness cardstock and cut it to a rough size to fit the model on. Then I got some thin EVA fun foam and began to create a pattern similar to the process I used on my wall sections. […]
LikeLike
Thank you for the how to. Cheap, effective and looks the part. 🙂
LikeLike
No problem, I’ll be trying to go through everything from top to bottom,starting at the easy stuff right up to more advanced, so stay tuned!
LikeLike
[…] going to need the same pine wood battons like what were used in the walls tutorial, and in some respect is the same principle, so as well as a couple of popsicle sticks and maybe […]
LikeLike
[…] the method for covering the dungeon walls to create some texture detail to match the rest of the dungeon, it’s up to you as you could […]
LikeLike
[…] that is found in many a fantasy dungeon scenario, the cavern. I touched upon this before in my brick modular wall article at the beginning, but this one is a slightly tricky make. It involves a can of expanding foam gap […]
LikeLike
[…] up would need. The easiest way to tackle this for me, was to make a piece that would fit the other modular dungeon wall sections too, then I could create more deviations in a basic dungeon/cavern set up on the […]
LikeLike
[…] really great for simulating cobbles, bubbles and similar. I’ve used it before in the Walls tutorial, but its uses go way beyond just cladding stuff, here’s a look at the […]
LikeLike
[…] SECTIONS- The same goes with the wall sections, only with slight modification. I would recommend that the only thing that i’d do different […]
LikeLike
[…] some trouble getting hold of textured wallpaper samples like I’ve been going on about in the walls and floors tutorials. It seems like those of you especially in the US are finding it difficult to […]
LikeLike
[…] detail the walls and floor just as the Wall sections to match the rest of the dungeon pieces (See Wall sections tutorial) make sure you leave the area underneath where the bar fits to achieve a good fit when it comes to […]
LikeLike
[…] use the bottoms of these boxes, so use the measurement of the exact same size of the height of your wall sections for the rest of your dungeon. This is an important convention in the whole dungeons of doom system […]
LikeLike
[…] first we have to match these stairs up with the height of your wall sections. I’m using some of the spare wood I use for my own wall pieces to measure up the two sides of […]
LikeLike
[…] the sections to a base of thick card etc. Again this is the same length as the longest dungeon wall sections in my set. This helps make a better fit with the other wall […]
LikeLike
Quite amazing idea for using wood. I know the dungeons made of blue or pink insulation foam. Your way is faster, that’s for sure! Great tutorials and amazing Website, too. Thanks for sharing and the Inspiration.
Regards
Thomas
LikeLike